My BoboVR F2 fan for the Meta Quest 2 VR headset stopped charging/working, and since it was only a couple months old BoboVR support team was great and sent me a replacement. My original F2 was the version that clipped into the facial interface. The replacement is the newer magnetically held on version.
Since I got the replacement, and the old one was broken, I took it apart.
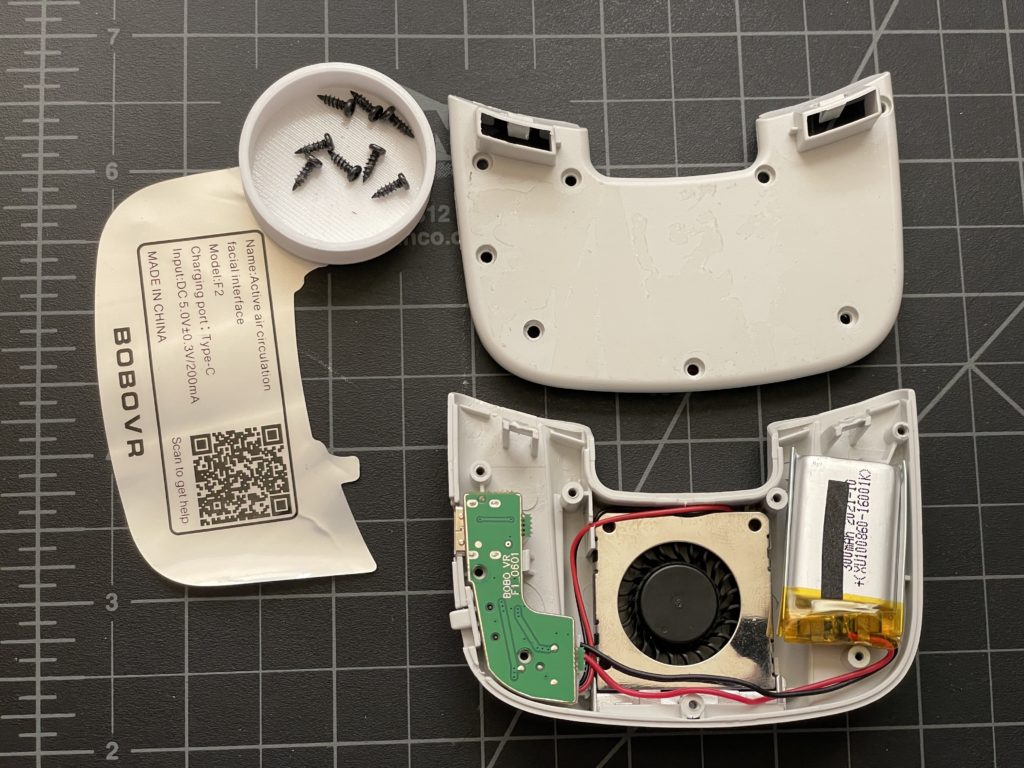
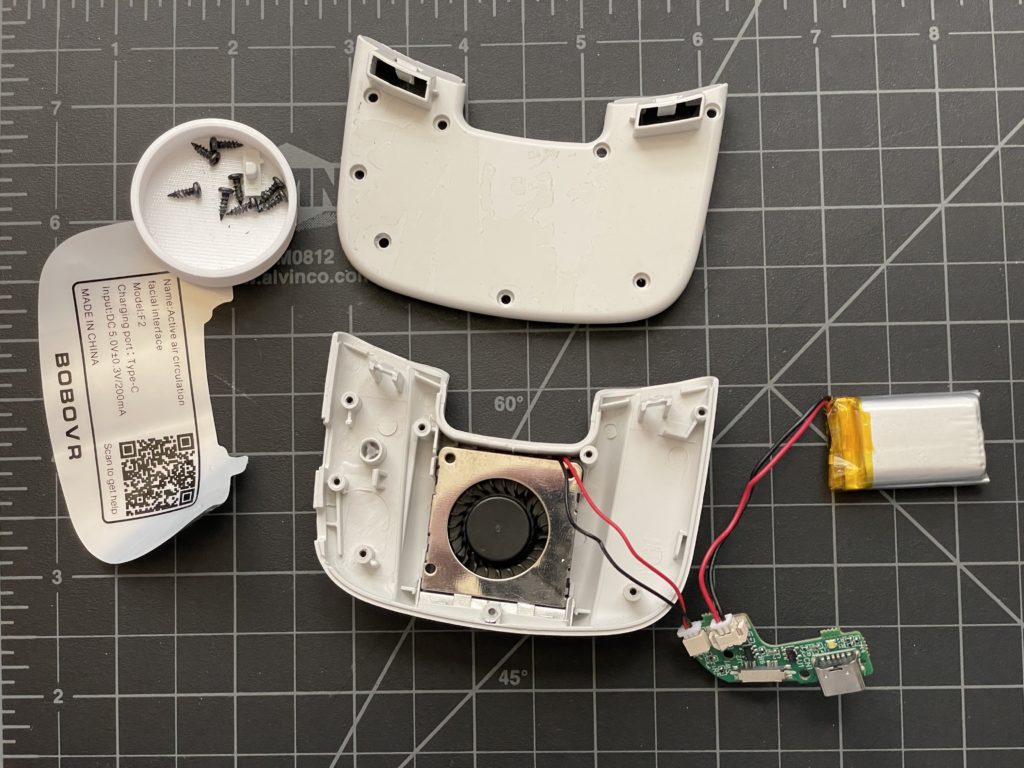
So there you go with some photos so you don’t destroy the F2 fan unit should want to take it apart. I have not checked on the newer magnetic version of the F2 fan; I suspect disassembly may be similar.
Happy hacking.
One reply on “BoboVR F2 fan disassembly”
Magnetic version take apart exactly the same. Thank you for being first. My problem was that the fan blades were making noise against the fan shroud. I manipulated the shroud a bit & it’s better. The clips in back were a trick though.